MULTI REGION DISASTER RECOVERY
USING AWS CLOUD
Multi Region Disaster Recovery Using AWS Cloud
In this blog we will be discussing about AWS Elastic Disaster Recovery that can be used for Business Continuity and Disaster Recovery purposes. AWS Elastic Disaster Recovery (AWS EDR) is a service that enables customers to protect their applications and data from disasters by replicating them to a secondary AWS region. The service automatically provisions and manages the infrastructure and replication required for disaster recovery, enabling customers to quickly failover to the secondary region in the event of a disaster.
One of the key benefits of using AWS Elastic Disaster Recovery is that it provides a low-cost and highly available disaster recovery solution. With EDR, customers can replicate their applications and data to a secondary region at a fraction of the cost of traditional disaster recovery solutions. Additionally, EDR provides a high level of availability by automatically replicating data and applications to the secondary region, ensuring that they are always available in the event of a disaster.
Environment Details
Source Server Details
-
Region - Mumbai
-
VPC - Source VPC (172.16.0.0/16)
-
Server Name - Source_Server_Mumbai
-
Subnet Name - Source Subnet (172.16.3.0/24)
-
Public IP - 65.2.75.148
-
Private IP - 172.16.3.21
Destination Server Details
-
Region - Singapore
-
VPC - SG-VPC (192.168.0.0/16)
-
Subnet Name - Destination Subnet (192.168.1.0/24)
Implementation Steps
-
As both the servers are in different VPC’s, in order for the communication to happen bi-directional VPC peering has to be done.

-
In the Source Subnet we need to add route towards destination 192.168.0.0/16 via Peering connection in Mumbai
-
Similarly in the Destination Subnet we need to add route towards source 172.16.0.0/16 via peering connection in Singapore
Replication Server Settings
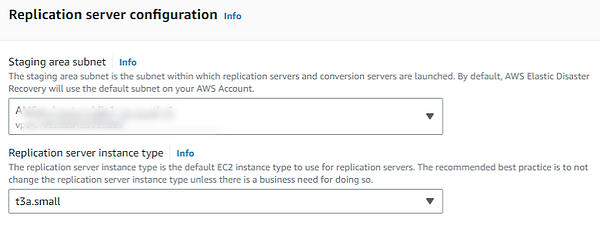
Replication Servers are lightweight Amazon EC2 instances that are used to replicate data between your source servers and AWS. Replication Servers are automatically launched and terminated as needed.
First we need to provide a Subnet and instance type for replication server.

Now we can specify the volume of the replicating server. For reducing cost choose “Lower cost throughput optimized HDD (st1)”, but it can affect the performance of copying.

Next is the security group, we can choose an existing Security group in which port 1500 is opened or create a new security group with the default settings.

There are some additional settings like Data routing and throttling, Point in time (PIT) policy, Tags, etc. which can be chosen based on our requirement.
Enabling Replication between Source and Destination
We can enable replication between source and destination or we can add source server by installing AWS Replication Agent on them. Download the package using the below command.
wget -O ./aws-replication-installer-init.py https://aws-elastic-disaster-recovery-us-east-1.s3.us-east-1.amazonaws.com/latest/linux/aws-replication-installer-init.py
Run the installation script as shown below.
sudo python3 aws-replication-installer-init.py
It will ask for AWS region, Access Key, Secret Key and Disks that has to be replicated. Provide appropriate details and once the installation is completed the source server will be listed on the DRS console.

Go to AWS EDR Console and click on Source Servers, We can see the Initial Sync happening. Wait till the status becomes Ready.

Failover
Now we can initiate a recovery drill or actual recovery.

This will give us an option to choose point in time snapshot and based on our requirement we can choose the appropriate one and proceed accordingly.

We can view the job status in “Recovery Job History” tab.

Recovery instance will take a couple of minutes to spin up and once it is ready, we can go to the EC2 console and login to the server.
Failback
For Failback, first we can do a reverse replication, which will replicate the data from DR to DC and then we can complete the failback.

Author
Cyril Johnson, StarOne IT Solutions


